Darty-Ai’s Sheet Builder
Darty-Ai’s Sheet Builder makes it easy to apply methods to your artwork: choose a method, select its target, and adjust its settings with familiar controls inside Illustrator. Place images, replace text, change colors, and generate codes visually, then save the setup in a reusable spreadsheet. One design can become a complete product range, with each row supplying the content for a different item.
In this example, we turn a single box template into fifteen seed starter kits: five herbs, five flowers and five vegetables. Each has two product images, its own growing-instructions table, text, barcode and QR code. The boxes below are mockups made from the generated artwork.
1. Prepare the Illustrator template
Start with a normal Illustrator document. Keep the fonts, fixed artwork and basic layout in the template. Add simple placeholders for the content that changes, then give those objects descriptive Darty-Ai tags.
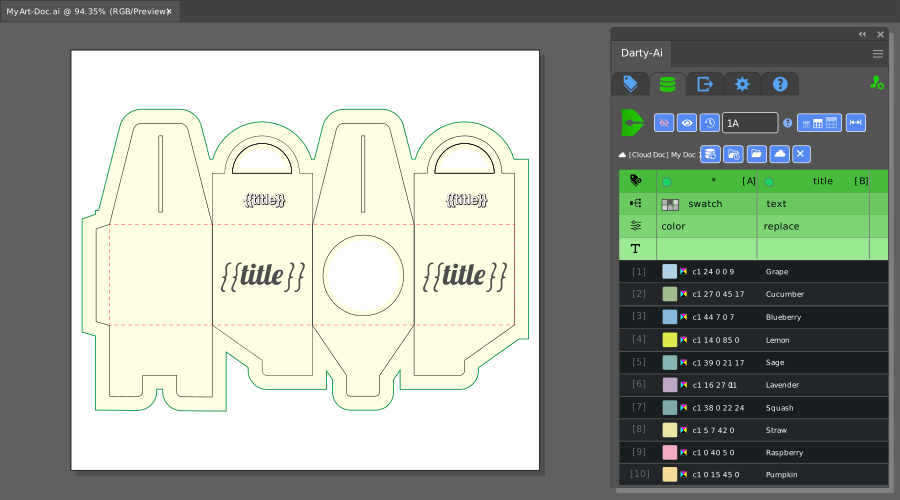
Our 110 × 80 × 50 mm box has tags such as front-image, side-image, table and product-text. Several colored bars share the tag bar, so one method can recolor them together.
Open Window → Darty-Ai → Darty-Ai Tags to inspect the tags on selected artwork. View → Show Darty-Ai Annotations displays them on the document. For changing text, add a named placeholder such as {{prod-name}} wherever that value belongs.
2. Put shared settings in the header
Open Tools → Builder. Each method block describes one action: place an image, create a table, replace text, change an appearance, or adjust the layout. Its header defines the target and shared settings. The product rows underneath supply the values that vary.
When editing a method header, click a field’s label to include that property in the sheet. Included labels appear green. Give the property a shared default, or leave it ready for a value in each product row. Include the controls you need for the job.
Add the Template method and choose the saved Illustrator template before previewing. Each record can then be applied to a preview copy of that template.
3. Build one image rule, then reuse it
- Add a Place method and select File Path as its source.
- Set Tag Search to
side-image. Use Selection Tags can pick up tags from the selected artwork. - Set the common image folder in the header and choose Fit to keep the whole image within its placeholder.
- Apply the header, enter one product’s filename in the row below, and preview that record.
The front image uses the same approach with another target and folder. Duplicate a similar method block and edit the differences. Add or duplicate a product row to extend the range.
For a portable project, {{DATA}} represents the folder containing the saved data workbook. In this demo, a shared folder such as {{DATA}}/../Images/Side/ combines with a filename such as dwarf-sunflower-side.png. See Placing Images for more on paths and fitting.
4. Take growing instructions from a workbook
The table content lives in a separate Excel workbook with three sheets: Herbs, Flowers and Vegetables. Each sheet has five product columns. The product name is at the top, followed by one growing instruction per cell. Products can have different numbers of instructions.
In the Table method, choose the workbook as a shared default. Include Sheet Name and Range, then supply those values in each product row. Use a range beginning at row 1 if the product name should be part of the table; start at row 2 if you only want the instructions. Change the last row to match the content. Auto Trim can remove empty rows around the supplied data.
Choose a table style as a starting point for fills, borders and text. You can choose which categories of the style to apply, then adjust details such as padding and alignment. Those settings can be shared across the range.
Add small artwork inside the table
Anchored artwork lets an icon belong to a table cell. Our growing instructions use full-sun and partial-sun icons. The table’s Artwork controls define the source, size, padding and position, keeping the symbol with its cell.
5. Replace the copy and decide how it fits
A Text method follows the same pattern: choose the tagged artwork, specify what to find, and supply the replacement for each product. Repeating {{prod-name}} around the package lets one replacement rule keep the names consistent. Use separate rules for the short and longer descriptions.
Text fitting handles differences in length. Here, we would like the short description to stay on one line, with a minimum font size to keep it readable. If the required shrink would exceed that limit, the selected fallback can retain the original size and allow a second line. The larger cell editor is useful for longer copy.
6. Generate the codes and coordinate the colors
Use the Barcode method to generate a code from the row’s data. Choose the required format and target tag. A separate block creates the QR code. The code format can be shared while each product supplies its own value.
Use valid data for the chosen format and check the final codes in their intended output size. Preview checks the artwork placement; scan testing checks the finished result.
The Appearance method changes all objects tagged bar together. In this example, each row selects a named swatch, including the prepared gradients. The layout stays consistent while the product palette changes.
7. Let the layout follow the content
A longer description can affect the rest of the design. In this example, the replaced display text is outlined so its visible bounds can be used as a reference. An Align method positions the top of the lower bar 12 pt below the bottom of that text.
The image group is centered in the remaining space using a fixed reference in the template. Size From also lets a label background take its size from the product name, with extra room for padding.
8. Preview the variations, then save the setup
Start with one working record, then preview examples that test the design: a short and a long name, one-line and two-line descriptions, and tables with different row counts. Check image rotation, code placement, spacing and the preview report.
Save the workbook to reuse the setup. You can enter more product data in Excel or return to Builder to adjust a method. After editing the workbook externally, reload it in Builder before previewing. When the results are ready, use Darty-Ai’s export workflow to generate the required files.
Keep the template, workbook and linked assets together. The next product can then start with a new record and the same design rules.
Ready to build your first sheet? Begin with a tagged template and one image or text replacement. Once that record works, add the next method. The Getting Started guide covers the foundations, and the video above shows how those pieces become a complete product range.